目录
个人的一些脚本和代码,经常会分散在不同的地方,管理起来并不方便,例如给WordPress编写的Plugin、测试MySQL时使用的一些脚本等,所以打算全部使用GitHub管理起来。对于个人使用,GitHub提供了私人仓库以存储代码,可以较为方便的管理一些还没有公开的个人代码。
建立个人Git和GitHub环境
GitHub CLI是一个具体简单交互式操作的命令行,可以完成与GitHub相关的一些交互与操作。对应的软件包/命令是gh。
安装gh-cli
参考:Installing gh on Linux and BSD。Amazon Linux 2上安装:
sudo yum-config-manager --add-repo https://cli.github.com/packages/rpm/gh-cli.repo
sudo yum install gh
使用gh配置GitHub授权
接着,就可以使用gh auth login命令来进行GitHub的认证了(gh cli manual)。这是一个简单的交互式命令,这里使用https+token的方式完成认证(也可以使用浏览器的方式辅助完成命令行认证):
gh auth login
? What account do you want to log into? GitHub.com
? What is your preferred protocol for Git operations on this host? HTTPS
? Authenticate Git with your GitHub credentials? Yes
? How would you like to authenticate GitHub CLI? Paste an authentication token
Tip: you can generate a Personal Access Token here https://github.com/settings/tokens
The minimum required scopes are 'repo', 'read:org', 'workflow'.
? Paste your authentication token: *********************************************************************************************
- gh config set -h github.com git_protocol https
✓ Configured git protocol
! Authentication credentials saved in plain text
✓ Logged in as orczhou关于Token的配置与获取,可以参考:GitHub->Settings->Developer Settings ,这里不再详述。注意,Token意味着分配的所有的仓库权限,必须妥善保管,否则可能会带来巨大的安全隐患。
如果要登出的话,则可以简单的使用如下命令:
gh auth logout在本地pull与push仓库
- 首先,在git中配置本地身份(用户名与)
git config --global user.name "orczhou"
git config --global user.email "orczhou@orczhou"- 首先,新建一个本地模板,并使用git命令初始化
mkdir  terraform && cd terraform
git init- 配置远端(remote)分支;并拉取远端代码
git remote add origin https://github.com/orczhou/cloud-mysql-benchmark.git
git pull origin main
向远端push代码
这时,如果修改了仓库中的代码,则可以使用push命令向远端发起提交请求。
修改、测试并本地提交代码:
vi gcp_rds_ins/all_in_one/README.md
git add gcp_rds_ins/all_in_one/README.md
git commit -m "gcp readme updated"
向远端push修改:
git push -u origin main该操作会向远端仓库的main分支,提交代码。
向main分之合并代码
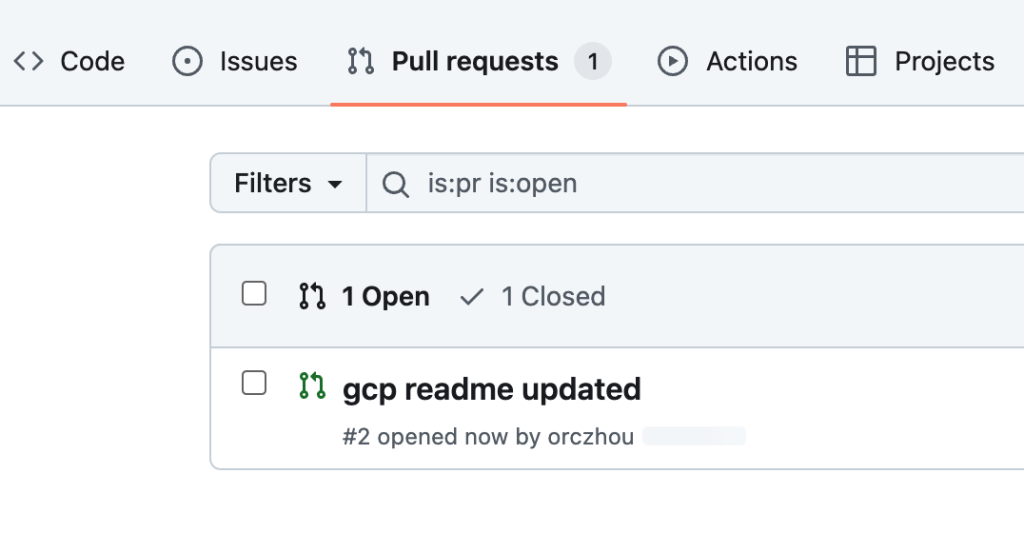
可以在GitHub仓库页面,对比并创建一个pull request。
发起pr之后,代码仓库则可以进行merge操作,将代码合并到main分之。


在新增远程代码库(origin)
git remote add origin https://github.com/orczhou/testing-delete-repo-if-u-like.git将本地代码,提交到远程代码库(origin)的main分支:
git push -u origin main上面的,-u origin main ,其中-u参数表示push的目标代码库-u | --set-upstream
在现有仓库的main分之上开发
经常需要做这个动作,常用的命令比较简单,这里记录如下:
mkdir repo_bench && cd repo_bench
git init
git branch -M main
git remote add origin https://...
git pull origin main
直接修改本地main中的代码并提交到源端:
cat "..." > README.md
git add README.md
git commit -m "first commit" --dry-run
git commit -m "first commit"
git push -u origin main
使用gitignore忽略文件
在代码开发过程中,由于编译、运行等原因会产生很多的中间文件,而这些中间文件时无需提交到代码仓库的。这时候,需要使用gitignore来忽略这部分文件。详细完整的gitignore的使用可以参考man gitignore。
常用的gitignore是可以通过.gitignore文件来实现,即在代码的根目录中新建该文件,那么在代码处理时,就会根据根据该文件的规则进行忽略。例如Terraform脚本常用的gitignore文件可以参考:
所以,一个Terraform脚本的.gitignore可以依次作参考:
# Compiled files
*.tfstate
*.tfstate.backup
*.tfstate.lock.info

# Directories
.terraform/
.vagrant/

# SSH Keys
*.pem

# Ignored Terraform files
*gitignore*.tf
master分支与main分支
在搜索git/github的相关资料的时候,经常还会搜索到master分支作为主分支的资料或者仓库。在2020年的George Floyd的案件发生后,美国的Black_Lives_Matter运动达到了前所未有的高度,最终也影响到在计算机领域的master/slave 一词的使用。更多的参考:Renaming the default branch from master@GitHub、Why GitHub renamed its master branch to main@theserverside。
不过,git在本地默认还是使用默认的master分支,所以如果没有手动切换分支,则还是会经常“默认的”创建master分支。
查看未提交的修改
git面向的场景就是分布式、多任务的开发代码管理,其独特的”three tree“模型可以很巧妙的实现这些能力。这也给初学者带来了很多理解上的障碍。

git diff与git diff HEAD
如果,想要查看自上次commit以来的所有变更,则需要试用git diff HEAD命令,通常HEAD指向的是,最后一次commit时的位置。
# diff between "working" and "staging"
git diff
# diff between "working" and "repository"
git diff HEAD# diff between "staging" and "repository"
git diff --cached同步远程更新
个人代码仓库管理中,有时候会有这样的情况:直接在远程仓库中修改了一些文件,然后如何让本地和远程保持同步。考虑这样的场景:直接在GitHub上对README.md文件进行了编辑,那么本地代码仓库如何保持这个更新。
当然,这样做,通常可能会很危险:可能会覆盖掉你本地所做的更改,但是基于上面的场景,所以,有时候会需要这么做。Stackoverflow上有几个相关的问题,非常详细的介绍了做法:
- How do I pull files from remote without overwriting local files?
- What is the difference between ‘git pull’ and ‘git fetch’?
这里的推荐做法是这样,如果本地仓库的修改确定不要了(通常这是很危险的):
git pull如果本地仓库修改都还需要:
git stash
git pull
git stash pop
还可以:
- 先使用
git fetch更新origin/main - 然后使用
git diff main origin/main查看本地与远程的差异 - 最后使用
git merge将origin/main与本地合并,并保持在本地
这样origin/main是最新的,且本地分支也是最新的了
git fetch
git diff main origin/main
git merge
Leave a Reply